HPC4AI Documentation

HPC Slurm cluster
Accessing the system
Please keep in mind you need a Google account for these steps.
- The procedure to access the cluster is the following:
- Request an account by filling out our registration form
- Once the account is approved, log into GitLab using the C3S Unified Login option
- Upload your public SSH key to your account in the corresponding page
- Login through SSH at <username>@slurm.hpc4ai.unito.it
- With the same account you can log into the web calendar to book the system resources (more details below)
System architecture
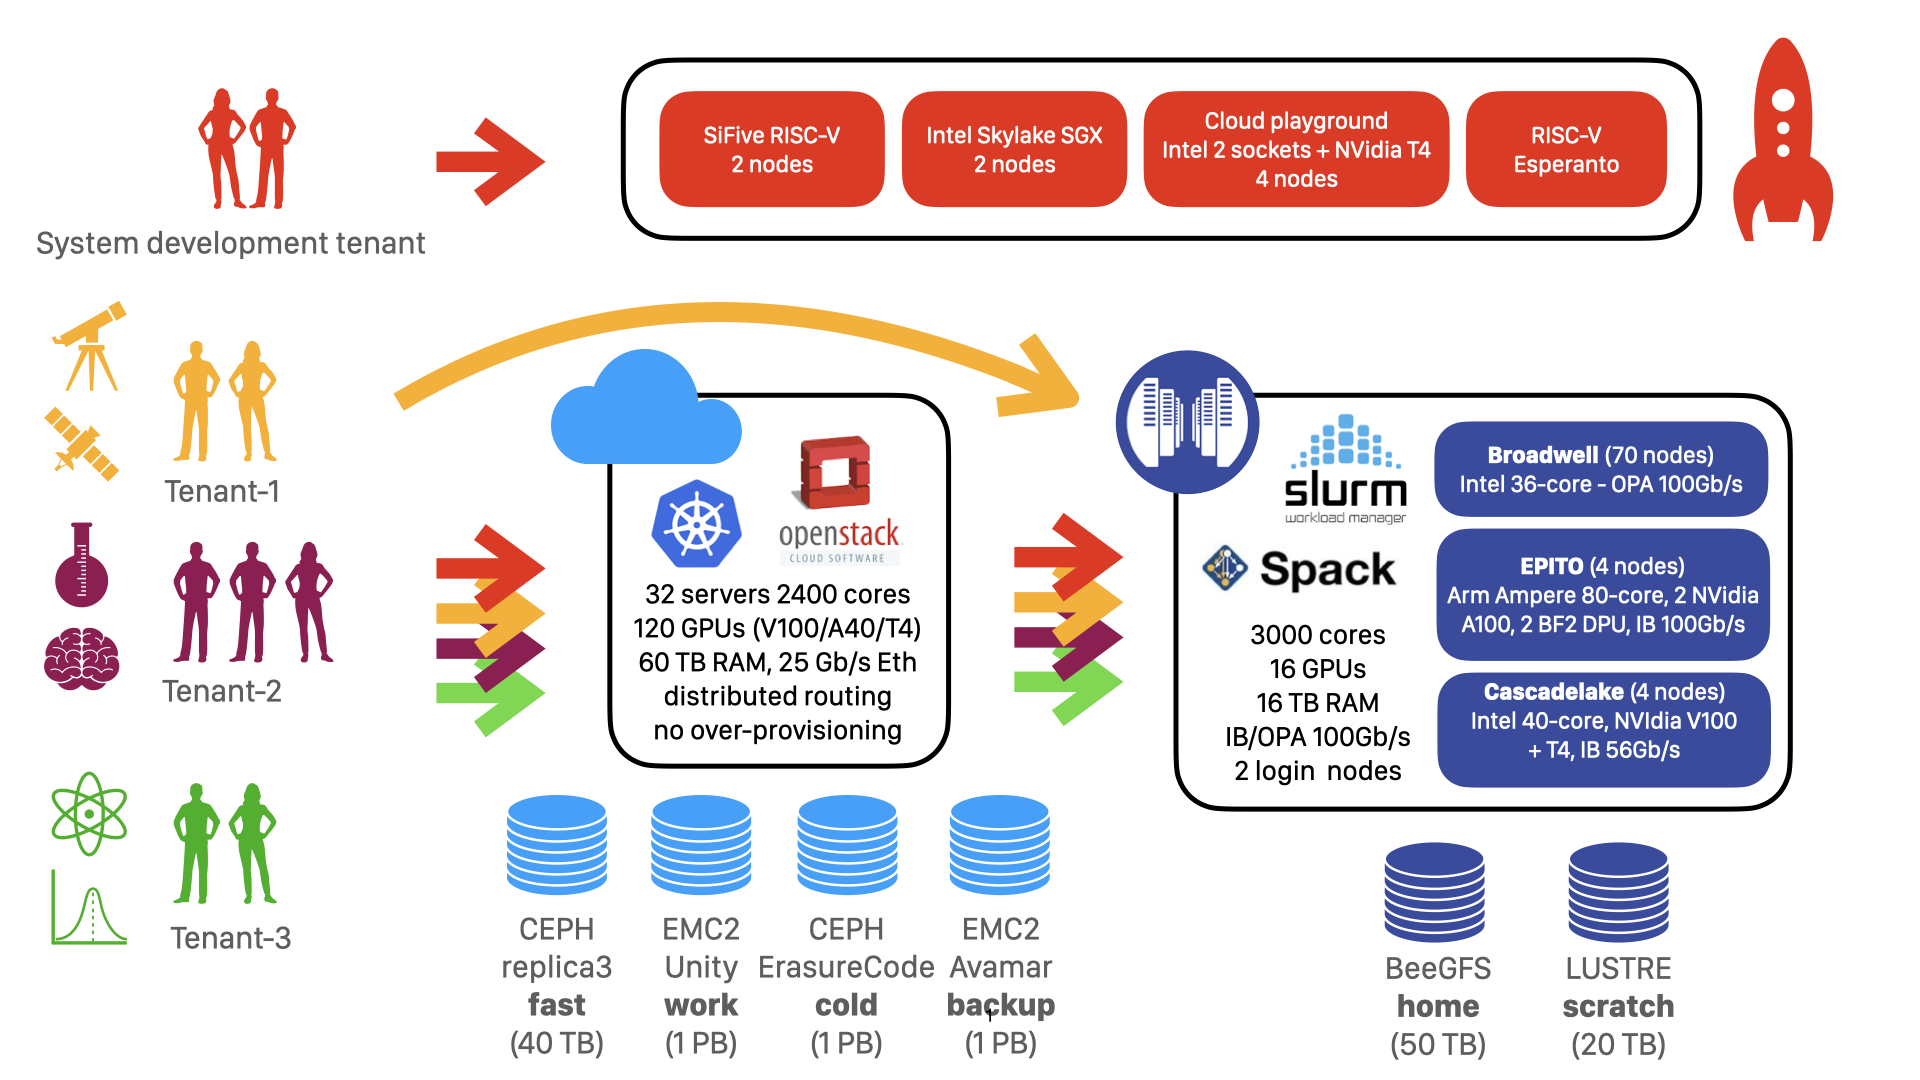
Nodes
- 1 login nodes PowerEdge R740xd
- 2 x Intel(R) Xeon(R) Gold 6238R CPU
- 251 GiB RAM
- InfiniBand network
- OmniPath network
- 4 compute nodes Supermicro SYS-2029U-TRT
- 2 x Intel(R) Xeon(R) Gold 6230 CPU
- 1536 GiB RAM
- 1 x NVIDIA Tesla T4 GPU
- 1 x NVIDIA Tesla V100S GPU
- InfiniBand network
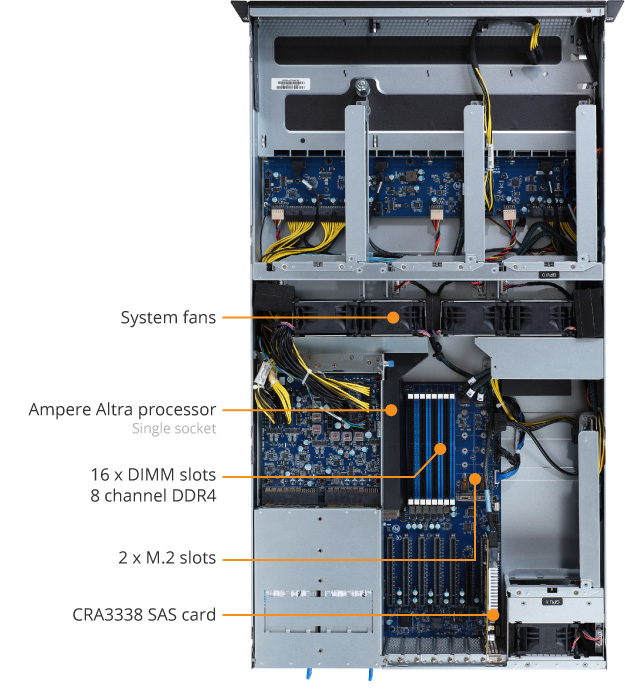
- 4 compute nodes GigaByte G242-P32-QZ
- 1 Ampere Altra Q80-30 CPU (80-core Arm Neoverse M1)
- 502 GiB RAM
- 2 x NVIDIA A100 GPU
- 2 x NVIDIA BlueField-2 DPU
- InfiniBand network
- 4 compute nodes Grace Hopper Superchips
- 1 NVIDIA Grace CPU
- 573 GiB RAM
- InfiniBand network
- 1 x NVIDIA H100 GPU
- 68 compute nodes Lenovo NeXtScale nx360 M5
- 2 x Intel(R) Xeon(R) CPU E5-2697 v4
- 125 GiB RAM
- OmniPath network
Booking resources
BookedSlurm
We developed a custom Slurm plugin called BookedSlurm which enables the integration between Slurm and a web calendar called Booked.
In the system, resource usage is accounted using credits, the Booked paid currency. There are 2 different Slurm partitions for each type of computational resources, the former called with the resource name and the latter with the addition of the “-booked” suffix.
The first type is the free for all partition: everyone can submit jobs to these queues, with a time limit of 6 hours. The second type, with the “-booked” suffix, is available only with a reservation.
How do reservations work?
By logging into the Booked calendar hosted here: https://c3s.unito.it/booked/, you will find the list of nodes available in the system. By clicking the “Reserve” button you can book the resources you need for a certain amount of 2-hours time slots, allowing to run jobs lasting more than 6 hours. Every resource has a specific cost related to its CPU power, its memory and the number of GPUs.
Once the reservation is confirmed, the booked resources under Slurm will be available only for your user for the whole duration of the reservation.
- To run jobs under the reservation you have to add two flags to your submit line:
- –partition={partition_name}-booked — if you don’t specify the “-booked” suffix the jobs will have a maximum duration of 6 hours. You can list the available partition with the Slurm command “sinfo”
- –reservation={reservation_name} — you have to specify the name of the reservation you created on Booked. You can check the reservations available with the Slurm command “scontrol show res”
Keep in mind every job still running when the reservation ends will be cancelled by Slurm itself.
Services
Spack
You can install Spack using the command:
spack_setupand following the script prompts.
- To update Spack and its software repositories:
- check for the latest release here (e.g. v0.22.0)
- change directory to the spack repository (~spack if you used the spack_setup command for the installation)
- git pull -t && git checkout tags/v.22.0 (change the release accordingly to your needs)
Slurm REST APIs
Slurm REST APIs are available at the following URL
You can find the full documentation here
The basic usage is explained here
HelpDesk
For any request or problem, e.g. the installation of additional software, you can:
send an email to support@hpc4ai.unito.it
submit a ticket to the C3S helpdesk
Latest news
22/08/2024
Slurm updated to the latest release: 24.05.2.
Slurm REST APIs are now enabled at this URL
17/01/2024
Four NVIDIA Grace Hopper Superchip boards are now available under the “gracehopper” Slurm partition.
27/11/2023
IMPORTANT: an update to the Spack system repository broke compatibility with user installations.
To solve the issue you can either start with a fresh spack installation or update Spack using the following commands:
cd ~/spack
git pull
git checkout develop
If this procedure doesn’t solve the problem, we suggest starting with a fresh installation:
rm spack .spack
spack_setup
26/08/2023
You can now access Lustre filesystem also on the frontend node

